
# Import Revit Elements
MarkupX offers users the ability to place Revit elements directly into their model using instruction defined in a Bluebeam PDF. It is a 3-step process. Before configuring in Bluebeam, the below must happen.
- The user must configure the toolchest button in Bluebeam.
- The user needs to modify the settings in MarkupX.
- Drag and drop your toolchest markups with family information in Bluebeam.
- After your PDF is imported into MarkupX Automation, your Revit users will instantly be able to insert the family with a click of a button!
Configuring Bluebeam
To configure Bluebeam, the user needs to have the exact name of the family that is to be imported. We have provided a tool under settings to get the proper name.
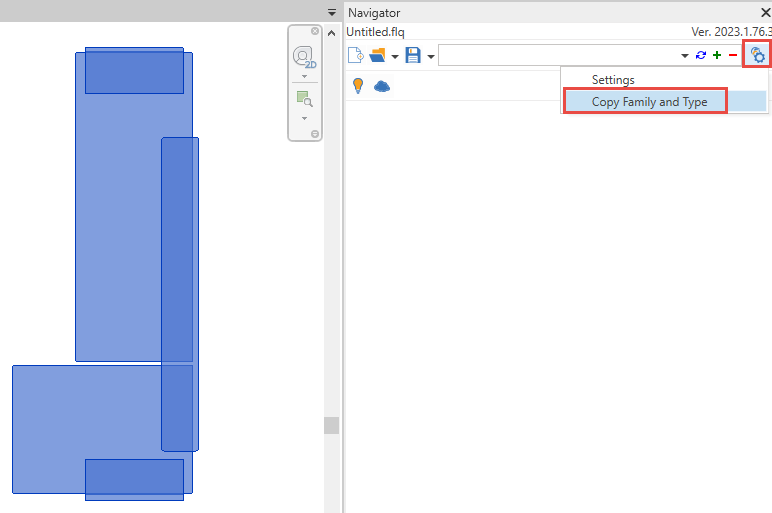
Select a family in Revit that you would like to add to the Bluebeam Toolchest.
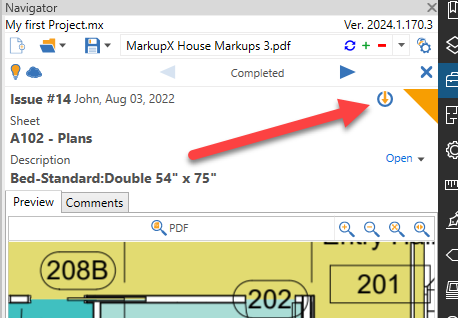
With the family selected in the model, go to the MarkupX Navigator and click on the button to the far right. This is the Settings button.
A pop-up menu will be displayed. In the menu select Copy Family and Type.
A dialog box is displayed.
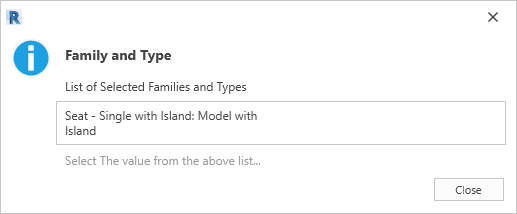
- In this dialog box just click inside the text box.
After clicking on a family and type name in the dialog box, it will show that the family name has been copied.
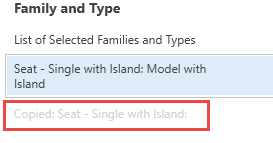
- Select the Close button to close this dialog box
This value needs to be pasted into a property in the Bluebeam Toolchest.
In Bluebeam create a Snapshot of the family that references the name that was copied.
Add this Snapshot to a Toolchest.
Paste this value either in the Subject or Layer of the Snapshot or create a Custom Column and paste it in there.

Reference the Bluebeam help to learn how to create Custom Columns, Snapshots and How to add a markup to a Toolchest. https://support.bluebeam.com/
After the Snapshot has been added to the toolchest, it can now be placed into the session. Once added to the Bluebeam session, save out a PDF and open it up in MarkupX.
# Configuring MarkupX to Insert Families
Bluebeam has been configured to place Snapshots that reference families. it is now time to configure MarkupX to recognize these items in the PDF.
- Import a PDF that has been configured with Family Placements. See Import a PDF in this User Manuel for more details.
- In the Navigator Panel select the Setting Button.
- In the Pop-up menu select Settings.
The Navigator Setting dialog box is displayed.
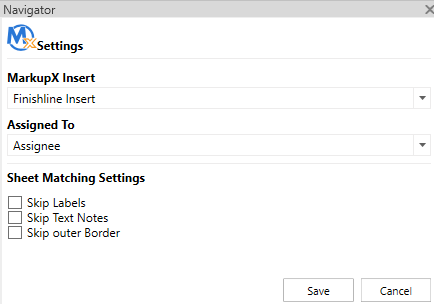
The MarkupX Insert property is where the user defines where the Family Name and Type are coming from out of Bluebeam.
- Select the drop-down list next to MarkupX Insert. This will display all the fields that MarkupX finds in the PDF.
Note: A PDF must be loaded to see any of the custom fields. If the same custom field is used for all projects, this setting will remember the setting. If the field changes, the user will need to reset this setting each time it changes.
- Select the appropriate field then select the Save button.
It is now time to insert the families into Revit. **Remember this field is where you are telling MarkupX to look for the Family Name and Type. If MarkupX does not find it in this location, the families cannot be placed.
# Place Families in Revit
After Bluebeam and MarkupX have been configured so MarkupX can place families, it is now time to place them in the model. To place families, a user can filter out all other markups and only show markups that are to be placed. This is done in Filtering.
In the Navigator Panel, select Filtering.
In the Filtering pop-up menu, uncheck Show Markups under Markup Type. This will turn off only all the standard markups and only show the Family Insert ones.
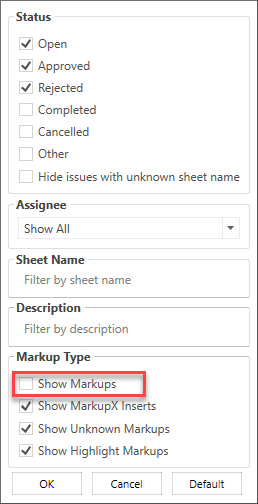
Select the OK button to apply the selection.
Navigator Panel should now only display the markups families that are to be inserted.
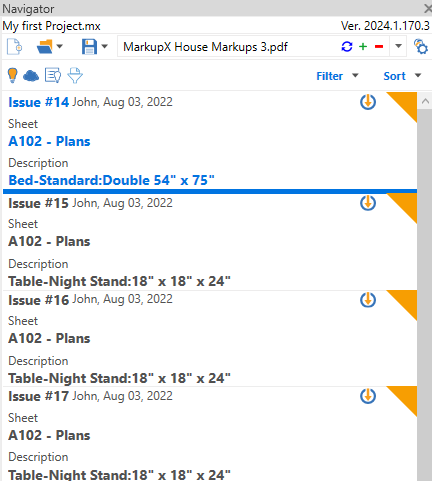
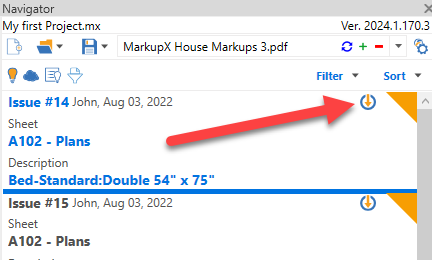
Placing a family can be done in List View or Edit Mode. There is an icon to place the family. In List View it is located here.
In Edit Mode, it is located here.
- To place a family, click on the icon in either location.
This will place the family in the model. If it is a hosted element, MarkupX will insert the family into your project and allow the user to manually select the location on the host.